Greenhouse Gardening: Thriving in Winter’s Embrace

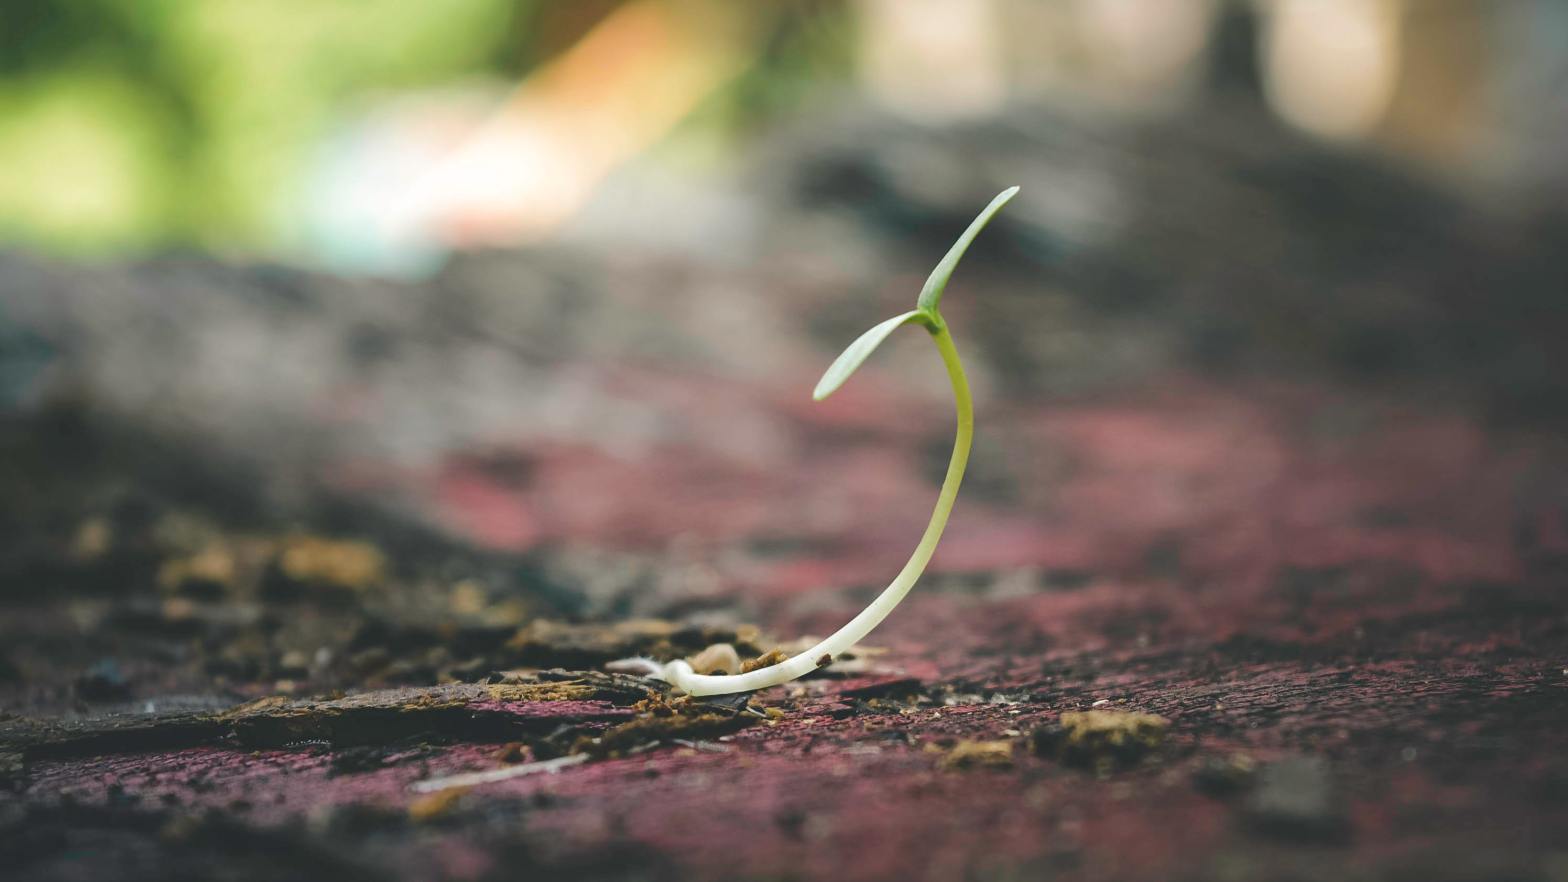
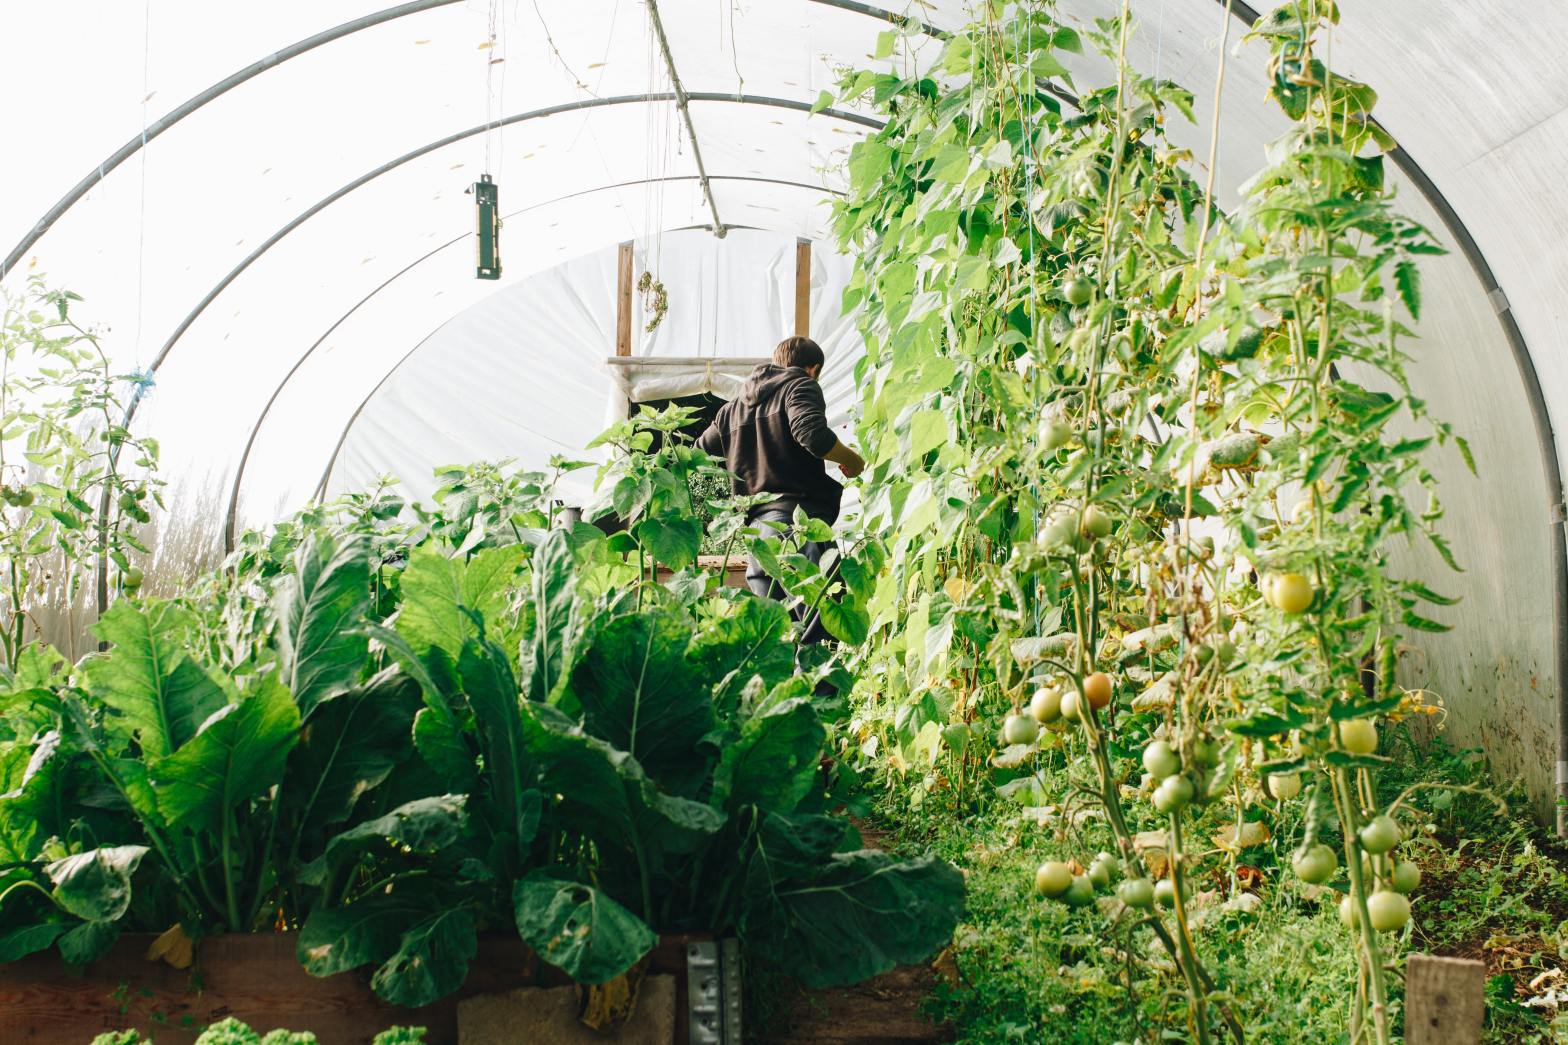
A well-maintained greenhouse is a valuable asset that allows gardeners to extend the growing season and enjoy fresh produce even during the winter months. With the right choice of plants and careful attention to their care, your greenhouse can continue to thrive when the outdoor garden is hibernating. In this guide, we’ll explore a variety of plants that are perfect for winter greenhouse gardening.

1. Cool-Season Vegetables:

One of the primary benefits of a greenhouse is the ability to grow cool-season vegetables during the winter. Some excellent choices include:

  • Lettuce: Varieties like butterhead, Romaine, and loose-leaf lettuce can thrive in the milder temperatures of a greenhouse.
  • Spinach: Cold-hardy and packed with nutrients, spinach is an excellent choice for greenhouse gardening.
  • Kale: This leafy green is hardy and nutritious, making it an ideal winter greenhouse crop.
  • Radishes: Fast-growing and cold-tolerant, radishes are perfect for greenhouse beds.

2. Herbs:

Herbs can flourish in a greenhouse during the winter months. Some popular choices include:

  • Parsley: This versatile herb can be used in a wide range of dishes and grows well in the controlled environment of a greenhouse.
  • Chives: Chives are hardy and easy to grow, even in the cooler temperatures of winter.
  • Cilantro: Cilantro is a staple in many culinary traditions and can thrive in a greenhouse’s protected environment.

3. Microgreens:

Microgreens are not only nutritious but also incredibly easy to grow in a greenhouse during the winter. Varieties like arugula, mustard greens, and radish microgreens are great choices.

4. Citrus Trees:

If you have the space and proper conditions, consider growing dwarf citrus trees in your greenhouse. Varieties like Meyer lemons, kumquats, and calamondins can thrive and provide you with a bountiful harvest of fresh fruit throughout the winter.

5. Exotic and Tropical Plants:

Your greenhouse can provide a warm, humid environment that’s perfect for exotic and tropical plants. Consider adding the following to your winter greenhouse garden:

  • Orchids: These stunning plants thrive in a greenhouse’s controlled environment.
  • Bromeliads: Colorful and easy to care for, bromeliads can add a tropical touch to your greenhouse.
  • Aloe Vera: This succulent has numerous health benefits and is well-suited for a greenhouse environment.

6. Winter-Flowering Plants:

To add a burst of color to your winter greenhouse, consider growing flowering plants that thrive in cooler conditions:

  • Camellias: These evergreen shrubs produce beautiful, waxy flowers during the winter months.
  • Cyclamen: With their charming, upswept flowers, cyclamens are a popular choice for winter greenhouse blooms.
  • Christmas Cacti: These succulent-like plants are known for their vibrant, long-lasting blooms around the holiday season.

7. Perennial Herbs:

Perennial herbs like rosemary, thyme, and oregano can continue to grow and thrive during the winter months in a greenhouse, providing fresh herbs for your culinary endeavors.

8. Root Vegetables:

Root vegetables like carrots, beets, and turnips can be grown in large containers or raised beds in the greenhouse during the winter, ensuring a fresh and local source of produce.

9. Spring-Blooming Bulbs:

To enjoy early spring blooms, consider forcing spring-blooming bulbs like tulips, daffodils, and hyacinths in pots or containers in your greenhouse during the winter.

Winter greenhouse gardening opens up a world of possibilities, from nourishing cool-season vegetables to creating a lush tropical paradise within its walls. By carefully selecting the right plants and providing the ideal growing conditions, you can enjoy a productive and beautiful winter garden while the world outside is covered in snow. Happy winter greenhouse gardening!

Winter-Proofing Your Greenhouse: How to Keep It Warm During the Cold Months

A greenhouse is a valuable asset for gardeners, providing a controlled environment that extends the growing season and protects your beloved plants from harsh weather conditions. However, as the temperature drops during the winter, it’s essential to take steps to ensure your greenhouse remains warm and hospitable for your plants. In this guide, we’ll explore practical tips and strategies to help you keep your greenhouse warm over the winter months.

1. Insulate Your Greenhouse

Proper insulation is the first line of defense against the cold. Insulating your greenhouse helps retain heat and reduce energy costs. Consider the following insulation options:

  • Bubble Wrap: Attach bubble wrap to the greenhouse frame to create an insulating layer. It traps heat while allowing light to penetrate.
  • Thermal Blankets: Thermal or shade blankets can be hung from the roof to reduce heat loss during the night.
  • Double-Wall Polycarbonate Panels: If your greenhouse has single-wall glazing, consider installing double-wall polycarbonate panels. They provide excellent insulation.

2. Seal Any Drafts

Inspect your greenhouse for any gaps, cracks, or drafts that could allow cold air to enter. Seal these areas with weatherstripping, caulk, or insulation tape to maintain a stable internal temperature.

3. Use Heaters

To provide additional warmth, invest in a greenhouse heater. Select a heater that suits the size of your greenhouse. Options include electric, propane, and natural gas heaters. Ensure the heater is safely installed and well-ventilated to prevent carbon monoxide buildup.

4. Utilize Thermal Mass

Thermal mass materials, such as stone or water containers, can absorb heat during the day and release it at night, helping to maintain a stable temperature. Place these materials strategically in your greenhouse.

5. Optimize Solar Gain

Maximize the use of solar energy by positioning your greenhouse so it receives maximum sunlight during the day. Keep windows and vents clean to allow sunlight to penetrate, and ensure that the glazing is free of dirt and debris.

6. Install Shade Cloth

In some cases, excessive sunlight can cause the greenhouse to overheat during the day and then cool down too quickly at night. To regulate the temperature, consider using shade cloth to reduce the intensity of the sunlight during the warmest part of the day.

7. Ventilation

Proper ventilation is crucial to prevent humidity buildup, which can lead to mold and disease. Install roof vents and side vents that can be opened on sunny days to allow excess heat to escape. Use automatic vent openers for convenience.

8. Heated Plant Beds

Create a warm and cozy environment for your plants by installing heated plant beds or propagation mats. These will help your plants establish healthy root systems and maintain warmth.

9. Monitor and Adjust

Invest in a thermometer and a thermostat to monitor the temperature inside your greenhouse. These tools will help you adjust your heating system and ventilation to maintain the desired temperature range.

10. Consider a Temporary Greenhouse

If your current greenhouse doesn’t provide adequate insulation for winter, you might want to invest in a temporary greenhouse or cold frame to place inside your existing structure. This can act as a mini greenhouse within your greenhouse.

With the right preparations and attention to detail, you can keep your greenhouse warm and provide a nurturing environment for your plants throughout the winter. By insulating, sealing drafts, using heaters, optimizing solar gain, and employing other strategies mentioned in this guide, you can ensure that your greenhouse remains a thriving oasis, even as the temperatures outside plummet. Happy winter gardening!

Transitioning Your Summer Garden into a Flourishing Fall Oasis

As the days grow shorter and temperatures start to drop, it’s time to transition your summer garden into a vibrant fall paradise. With the right planning and some strategic planting, you can extend your gardening season and enjoy a bountiful harvest well into the autumn months. In this guide, we’ll walk you through the steps to update your summer garden into a flourishing fall garden.

1. Evaluate Your Summer Garden

Before making any changes, assess the current state of your summer garden. Take note of which plants are still thriving and producing, as well as any that have started to decline. This evaluation will help you decide which areas of your garden to repurpose for fall planting.

2. Choose Suitable Fall Plants

Selecting the right plants for your fall garden is crucial. Look for varieties that are well-suited to cooler temperatures and shorter daylight hours. Some excellent options include:

  • Leafy Greens: Plant cool-season favorites like kale, spinach, lettuce, and Swiss chard. These greens thrive in the fall and can withstand light frosts.
  • Root Vegetables: Carrots, beets, turnips, and radishes are ideal for fall planting. Their flavors tend to improve as temperatures drop.
  • Cruciferous Vegetables: Broccoli, cauliflower, and Brussels sprouts can produce a late-season harvest if planted in late summer.
  • Herbs: Many herbs, such as parsley, cilantro, and chives, flourish in cooler weather.
  • Flowering Plants: Add color and beauty to your fall garden with pansies, mums, and ornamental cabbage.

3. Prepare the Soil

Ensure your garden soil is well-prepared for your new fall crops. Remove any spent summer plants and weeds, and amend the soil with compost to replenish nutrients. Loosen the soil to a depth of at least 6 inches to promote root growth.

4. Plant Strategically

When planting your fall crops, consider the following tips:

  • Succession Planting: Plant seeds or transplants at staggered intervals to ensure a continuous harvest throughout the fall.
  • Use Season Extenders: Consider using row covers or cloches to protect your crops from early frosts and extend the growing season.
  • Choose the Right Location: Plant cold-sensitive crops where they can receive the most sunlight during the shorter fall days.

5. Maintain Consistent Care

Just like in the summer, your fall garden will require regular care. Keep these points in mind:

  • Watering: Ensure your plants receive consistent moisture, especially during dry spells. Water early in the day to allow foliage to dry before nighttime, reducing the risk of fungal diseases.
  • Mulching: Apply a layer of mulch around your fall crops to help regulate soil temperature and retain moisture.
  • Fertilizing: Continue to feed your plants with a balanced fertilizer as needed, following package instructions.
  • Pest and Disease Control: Monitor for pests and diseases that may become more active in the fall. Take action promptly to prevent infestations.

6. Enjoy the Harvest

As your fall crops mature, start harvesting when they reach their peak flavor and size. Leafy greens and root vegetables are often at their best flavor after experiencing a light frost. Remember to use freshly harvested produce in your favorite fall recipes.

7. Extend the Season Further

To push your fall gardening season even further, consider investing in a small greenhouse or cold frame. These structures provide extra protection from frost and cold temperatures, allowing you to grow even more cold-tolerant crops.

Transitioning your summer garden into a flourishing fall garden is a rewarding endeavor that allows you to enjoy fresh produce well into the autumn months. By selecting suitable plants, preparing the soil, and providing proper care, you can create a beautiful and productive garden that embraces the changing seasons. With a little planning and effort, your garden can continue to thrive as the leaves turn and fall. Happy fall gardening!

From Seed to Garden: A Guide to Starting Seedlings and Transplanting Them Successfully

Starting your garden from seedlings is an immensely rewarding experience. It allows you to select your favorite plant varieties, save money, and watch your garden grow from the earliest stages. In this comprehensive guide, we’ll walk you through the process of starting seedlings indoors and successfully transplanting them into your garden for a bountiful harvest.

Step 1: Gather Your Supplies

Before you begin, ensure you have the necessary supplies:

  1. Seeds: Choose high-quality seeds suited for your growing zone and preferences.
  2. Seed Trays or Pots: Use trays or pots with drainage holes to prevent overwatering.
  3. Seed Starting Mix: This light, sterile mix promotes healthy seedling growth.
  4. Grow Lights or Sunny Window: Adequate light is crucial for seedling development.
  5. Heat Mat (Optional): It helps maintain consistent soil temperature for faster germination.

Step 2: Planting Seeds

  1. Fill Containers: Fill your seed trays or pots with the seed starting mix, leaving a small gap at the top.
  2. Moisten Soil: Water the soil evenly until it’s moist but not soggy.
  3. Plant Seeds: Follow the seed packet instructions for planting depth and spacing. Typically, plant seeds 2-3 times their diameter deep.
  4. Label: Label each tray or pot with the plant type and date sown to keep track of your seedlings.
  5. Cover and Encourage Germination: Cover your containers with a plastic lid or plastic wrap to create a mini-greenhouse effect. Place them in a warm, well-lit area or use a heat mat to maintain a consistent temperature.

Step 3: Caring for Seedlings

  1. Water Gently: Keep the soil consistently moist but not waterlogged. Use a spray bottle or a gentle stream of water to avoid disturbing delicate seedlings.
  2. Provide Adequate Light: Seedlings need 12-16 hours of light daily. If using a sunny window, rotate the trays to ensure even growth. Alternatively, use grow lights placed a few inches above the seedlings.
  3. Thin Seedlings: Once your seedlings have a few true leaves (the second set of leaves), thin them by removing weaker ones, leaving only the strongest plants.
  4. Fertilize Sparingly: When your seedlings have two sets of true leaves, start fertilizing with a diluted, balanced liquid fertilizer. Follow package instructions for application rates.

Step 4: Harden Off Seedlings

Before transplanting, your seedlings need to acclimate to outdoor conditions. This process, known as hardening off, should take about a week.

  1. Gradual Exposure: Place your seedlings outdoors in a sheltered spot for a few hours, gradually increasing the time and exposure to sunlight each day.
  2. Protect from Extremes: Protect seedlings from strong wind, heavy rain, or intense sunlight during the hardening-off period.

Step 5: Transplant Seedlings

  1. Choose the Right Time: Transplant seedlings when they have several sets of true leaves and the outdoor temperature matches the plant’s requirements. Consult your seed packet or local gardening guidelines.
  2. Prepare the Garden Bed: Ensure your garden soil is well-prepared with compost and is free of weeds. Dig holes slightly larger than the root ball of each seedling.
  3. Remove Seedlings Gently: Carefully remove seedlings from their containers, taking care not to damage the roots. You can use a fork or spoon to lift them out.
  4. Plant at the Right Depth: Place each seedling in its hole at the same depth it was growing in the container. Space them according to their mature size and requirements.
  5. Water and Mulch: Water the newly transplanted seedlings thoroughly. Apply a layer of mulch to conserve soil moisture and deter weeds.
  6. Provide Support if Needed: Some plants may benefit from stakes or cages for support as they grow.

Step 6: Monitor and Care for Your Garden

  1. Water Consistently: Keep the soil evenly moist, especially during dry spells.
  2. Protect from Pests and Diseases: Monitor for signs of pests or diseases and take appropriate measures to control them.
  3. Fertilize as Needed: Follow recommended fertilization guidelines for your specific plants.
  4. Enjoy the Fruits of Your Labor: Watch your seedlings thrive and produce a beautiful, productive garden.

Starting seedlings indoors and transplanting them into your garden is a gratifying journey that allows you to cultivate the garden of your dreams. By following these steps and providing your seedlings with the care and attention they deserve, you’ll enjoy the satisfaction of nurturing your plants from seed to harvest. Happy gardening!

The Top 10 Edible Annuals to Transform Your Garden into a Bounty of Flavor

Gardening is a delightful journey that connects us with the earth and rewards us with delicious, homegrown treats. If you’re eager to cultivate a garden bursting with flavor, then edible annuals should be at the top of your list. These versatile plants offer both beauty and bounty, ensuring a rewarding experience for gardeners of all levels. In this article, we’ll explore the top 10 edible annuals that will elevate your garden and your culinary creations.

1. Basil (Ocimum basilicum): Basil is a fragrant herb that brings a burst of flavor to salads, pasta, and more. Its lush green leaves and enticing aroma make it a garden favorite. Plant basil in well-drained soil and provide plenty of sunlight for a bountiful harvest.

2. Tomatoes (Solanum lycopersicum): Tomatoes are a staple in many gardens, and for good reason. These annuals offer a rainbow of colors and flavors, from sweet cherries to robust heirlooms. Stake or cage them for support, and watch them thrive in the sun.

3. Swiss Chard (Beta vulgaris var. cicla): Swiss chard is not only a nutritious leafy green but also an ornamental addition to your garden. Its vibrant, multicolored stems and glossy leaves can be enjoyed in salads, sautés, and as a side dish.

4. Peppers (Capsicum annuum): Peppers come in a wide range of heat levels and colors, from sweet bell peppers to fiery habaneros. These sun-loving annuals can be grown in containers or directly in the garden, adding spice to your culinary creations.

5. Zucchini (Cucurbita pepo): Zucchini plants are prolific producers, offering an abundance of tender, green fruits. Use them in savory dishes, fritters, or even bake them into scrumptious bread. Ensure they have room to sprawl and well-drained soil.

6. Cilantro (Coriandrum sativum): Cilantro is a versatile herb with a distinct, citrusy flavor. Its leaves are essential in Mexican and Asian cuisines, adding a burst of freshness to salsas, curries, and more. Plant cilantro in partial shade to prevent bolting.

7. Nasturtium (Tropaeolum majus): Nasturtiums are not just visually striking with their vibrant flowers; they’re also edible! Both the leaves and flowers have a peppery kick and can be used to garnish salads and dishes. These easy-to-grow annuals are perfect for beginners.

8. Marigolds (Tagetes spp.): Marigolds aren’t just pretty faces in the garden; they’re also edible! Their slightly citrusy petals can be used to add color and flavor to salads or as a garnish. Be sure to choose the edible varieties, such as Tagetes tenuifolia.

9. Cucumber (Cucumis sativus): Crisp, refreshing cucumbers are a must for any salad or refreshing summer beverage. These annual vines thrive when provided with plenty of water and support for climbing.

10. Sunflowers (Helianthus annuus): While sunflowers are typically grown for their stunning blooms, did you know that sunflower seeds are edible? Roast them for a tasty snack or use them as a garnish in salads. Choose edible seed varieties for the best results.

Incorporating these top 10 edible annuals into your garden will not only satisfy your taste buds but also enrich your gardening experience. Whether you’re a novice gardener or a seasoned pro, these versatile annuals are sure to bring joy to your garden and kitchen alike. Happy gardening and bon appétit!

Essential Gardening Tools: The Top 5 You Must Own

Whether you’re a seasoned gardener or just getting started with your green thumb adventures, having the right gardening tools can make a world of difference. These essential tools can help you tackle various gardening tasks with ease and efficiency. In this article, we’ll explore the top five gardening tools that every gardener should own to ensure success in their gardening endeavors.

1. Hand Trowel: The Garden Workhorse

A hand trowel is a versatile and indispensable tool for every gardener. This small, handheld tool is perfect for a wide range of tasks, including planting, transplanting, weeding, and digging small holes for seeds or bulbs. Look for a trowel with a sturdy, comfortable handle and a durable, rust-resistant blade. It’s a tool you’ll use again and again in your garden.

2. Pruning Shears: Trim and Shape with Precision

Pruning shears, also known as hand pruners or secateurs, are essential for maintaining the health and appearance of your plants. These tools are designed for precise cutting of branches, stems, and dead foliage. You can use them to shape shrubs, remove dead or diseased growth, and harvest fruits and flowers. Choose pruners with sharp, high-quality blades and ergonomic handles for comfortable use.

3. Garden Fork: The Soil Aerator

A garden fork is an excellent tool for loosening compacted soil, aerating the garden beds, and turning over organic matter. It’s particularly valuable for preparing the soil before planting and for dividing or lifting plants. Look for a garden fork with strong tines and a comfortable grip to make your soil work more manageable.

4. Garden Hoe: Weed Buster Extraordinaire

Weeds can quickly overrun your garden if left unchecked, making a garden hoe an essential tool. This versatile tool allows you to easily remove weeds from garden beds by slicing them just below the surface, preventing them from regrowing. A well-made garden hoe with a sharp blade can save you hours of laborious weeding.

5. Garden Gloves: Protect Your Hands

Last but certainly not least, a good pair of garden gloves is essential for protecting your hands from thorns, splinters, blisters, and soil-borne pathogens. Choose gloves made from durable, breathable materials that fit snugly but allow for flexibility and dexterity. With the right gloves, you can work comfortably and confidently in your garden without worrying about injuries.

Bonus Tool: Wheelbarrow or Garden Cart

While not a hand tool, a wheelbarrow or garden cart is a highly valuable addition to your gardening arsenal. These tools make it easy to transport heavy loads of soil, mulch, plants, and other materials around your garden. They save you time and effort while reducing strain on your back.

Equipping yourself with the right gardening tools is like having a trusty set of allies in your quest for a flourishing garden. The five essential tools mentioned—hand trowel, pruning shears, garden fork, garden hoe, and garden gloves—cover a wide range of gardening tasks, from planting to pruning to weeding. Additionally, consider investing in a wheelbarrow or garden cart for added convenience.

With these tools at your disposal, you’ll be well-prepared to nurture your plants, maintain your garden’s health, and enjoy the satisfaction of a well-tended outdoor space. So, gather your essential gardening tools, get out there, and let your green thumb shine. Happy gardening!

Mastering Weed Control: A Guide to Keeping Your Garden Weed-Free

Weeds can be the bane of any gardener’s existence. They compete with your beloved plants for nutrients, water, and sunlight, and if left unchecked, they can quickly take over your garden. But fear not! With the right techniques and a little diligence, you can keep your garden weed-free and ensure that your plants thrive. In this guide, we’ll explore effective strategies for weeding your garden and keeping those pesky intruders at bay.

1. Know Your Enemy: Identify Common Garden Weeds

Before you can effectively combat weeds, it’s essential to know what you’re up against. Common garden weeds include dandelions, crabgrass, chickweed, and thistles. Learn to recognize these intruders to spot them early and take action.

2. Start with a Clean Slate: Weed Removal Before Planting

If you’re starting a new garden bed, begin by removing all existing weeds. Use a garden fork or shovel to dig out the weeds, ensuring you remove their roots. This initial effort will give your plants a fighting chance by reducing the weed seed bank in the soil.

3. Mulch Your Garden Beds

Mulching is one of the most effective ways to prevent weeds from taking root. Apply a layer of organic mulch, such as straw, wood chips, or shredded leaves, to your garden beds. Mulch helps conserve soil moisture, maintain a consistent temperature, and block sunlight from reaching weed seeds, preventing them from germinating.

4. Regular Weeding Routine

Consistency is key when it comes to weed control. Make it a habit to inspect your garden regularly and pull out any weeds you find. It’s much easier to remove young weeds than well-established ones. Use a weeding tool or simply pull them by hand, ensuring you get the entire root system.

5. Weed After Rain or Watering

Weeding becomes more manageable when the soil is moist. After a rainfall or thorough watering, the ground will be softer, making it easier to remove weeds with their roots intact. Take advantage of these opportunities to weed your garden.

6. Use Weed Barriers

Consider using weed barriers or landscape fabric in your garden beds. These materials block sunlight and prevent weeds from growing through, while still allowing water to penetrate. Cut holes in the fabric to plant your desired vegetation, and cover the fabric with mulch for a neat appearance.

7. Companion Planting

Some plants, like marigolds and nasturtiums, are known to deter weeds with their natural pest-repelling properties. Integrate these companion plants into your garden to help reduce weed growth. They also add a splash of color and can attract beneficial insects.

8. Avoid Soil Disturbance

Weed seeds often lie dormant in the soil, waiting for an opportunity to sprout. Minimize soil disturbance by using no-till gardening methods whenever possible. When you do need to dig, do so carefully to avoid bringing buried weed seeds to the surface.

9. Apply Pre-Emergent Herbicides Sparingly

Pre-emergent herbicides can help prevent weed seeds from germinating, but they should be used with caution. Apply them sparingly and according to the manufacturer’s instructions. Keep in mind that they can also affect desirable plants, so use them only as a last resort.

10. Be Persistent and Patient

Weed control is an ongoing process. Even the most diligent gardeners will encounter weeds from time to time. Stay persistent, stay patient, and keep up with your weeding routine. The more you stay on top of it, the easier it becomes to maintain a weed-free garden.

Maintaining a weed-free garden requires dedication and regular effort, but the results are well worth it. A weed-free garden not only looks more attractive but also provides your plants with the best conditions to thrive. By knowing your enemy, using preventive measures like mulch and weed barriers, and staying vigilant with your weeding routine, you can keep your garden looking its best and ensure your plants have the upper hand in the battle against weeds. Happy gardening!

The Top 10 BEST Edible Perennials You Must Grow in Your Garden

Edible perennials are a gardener’s dream come true. These perennial plants provide a continuous supply of delicious food with minimal effort year after year. In this article, we’ll introduce you to the top ten unique edible perennials that every garden should include. From the hardy asparagus to the sweet bounty of raspberries, these perennial treasures will not only enhance your garden but also your dining table.

1. Asparagus (Asparagus officinalis):

Asparagus is a beloved perennial vegetable that produces tender, succulent shoots in the spring. Planting asparagus requires some patience as it takes a couple of years to establish a productive bed. However, once established, it can yield delicious spears for up to two decades with proper care. Harvest the young shoots when they are about 6-8 inches tall for the best flavor.

2. Rhubarb (Rheum rhabarbarum):

Rhubarb is a hardy perennial that produces tart, red or green stalks perfect for pies, jams, and desserts. This low-maintenance plant thrives in cooler climates and can be a striking addition to your garden due to its vibrant foliage. While the stalks are the edible part, the leaves are toxic and should not be consumed.

3. Raspberry (Rubus idaeus):

Raspberries are prolific producers, offering sweet and juicy berries for fresh eating, baking, or making preserves. These perennial berry bushes come in both red and black varieties, making them a versatile addition to your garden. Raspberry canes should be pruned regularly to ensure healthy growth and fruit production.

4. Strawberry (Fragaria x ananassa):

Strawberries are a garden favorite, known for their sweet and aromatic fruits. These perennials spread through runners, creating more plants each year and resulting in a bountiful crop of strawberries. They can be grown in garden beds, containers, or hanging baskets, making them a versatile choice for gardeners with limited space.

5. Blueberry (Vaccinium spp.):

Blueberries are a delightful addition to any garden, providing sweet, antioxidant-rich fruits that are perfect for snacking, baking, or adding to smoothies. These perennial shrubs thrive in acidic, well-drained soil and can produce a generous harvest year after year. With proper care and pruning, you can enjoy an abundant supply of fresh blueberries.

6. Blackberry (Rubus fruticosus):

Blackberries are another excellent choice for your edible perennial collection. These brambles produce juicy, sweet berries that are perfect for fresh eating, pies, and jams. Proper pruning and support are essential to maintain healthy, productive blackberry plants.

7. Chives (Allium schoenoprasum):

Chives are a versatile perennial herb that adds a mild onion flavor to your dishes. They produce slender green leaves and small, edible purple flowers. Chives are a perfect addition to herb gardens or as an attractive border plant.

8. Artichokes (Cynara scolymus):

Artichokes are unique edible perennials that are both delicious and ornamental. These plants produce large, edible flower buds that are a gourmet delight. They thrive in areas with mild winters and can be a striking addition to your garden.

9. Mint (Mentha spp.):

Mint is a fragrant perennial herb known for its refreshing flavor and versatile uses in the kitchen. It comes in various varieties, such as peppermint and spearmint, and can be used in beverages, salads, and desserts. Mint is easy to grow but can be invasive, so it’s best to plant it in containers or controlled areas.

10. Horseradish (Armoracia rusticana):

Horseradish is a pungent perennial plant known for its spicy roots, which are used to make a zesty condiment. It’s a hardy addition to your garden that requires little maintenance. Freshly grated horseradish adds a kick to sauces, dressings, and roast meats.

Adding unique edible perennials to your garden is a smart and rewarding choice. These top ten perennial plants provide a continuous source of fresh and flavorful produce without the need for annual replanting. Whether you’re craving the tender shoots of asparagus in spring, the tangy rhubarb for pies, or the sweet juiciness of raspberries, strawberries, blueberries, blackberries, chives, artichokes, mint, or horseradish in summer, these edible perennials have you covered. So, plant these perennial treasures in your garden and enjoy the satisfaction of homegrown goodness season after season. Happy gardening!

Extending Your Growing Season: Tips and Techniques for Year-Round Gardening

Gardening enthusiasts often face the challenge of wanting to grow fresh produce all year round, regardless of the seasons. Fortunately, with the right strategies and tools, you can extend your growing season and enjoy a continuous supply of homegrown vegetables, herbs, and even some fruits. In this guide, we will explore various methods to help you prolong your gardening season and harvest fresh produce in every season.

1. Choose the Right Plants:

Selecting the right plant varieties is crucial for year-round gardening success. Opt for cold-hardy vegetables like kale, spinach, and carrots that can withstand cooler temperatures, or invest in heat-tolerant varieties for summer gardening. Additionally, consider dwarf or compact fruit trees for a space-saving solution.

2. Use Season Extenders:

Season extenders are designed to protect your plants from harsh weather conditions and temperature fluctuations. Some popular options include:

  • Row Covers: Lightweight fabric covers can be draped over plants to provide frost protection and extend the growing season in early spring and late fall.
  • Cold Frames: These miniature greenhouses capture and retain heat, allowing you to start plants earlier in the spring and keep them growing later into the fall.
  • High Tunnels and Greenhouses: These structures offer temperature control and can accommodate a wide range of crops, allowing you to grow year-round in many regions.

3. Implement Succession Planting:

Succession planting involves sowing seeds or transplanting seedlings at intervals to ensure a continuous harvest. By planting new crops as others are harvested, you can maximize your garden’s productivity throughout the year.

4. Raised Beds and Container Gardening:

Raised beds and containers warm up faster in the spring, which means you can start planting earlier. They also provide better drainage, preventing waterlogged soil during heavy rains. This versatility allows for gardening on patios, balconies, or even rooftops.

5. Indoor Gardening:

Bringing your gardening indoors expands your growing season significantly. Consider growing herbs, microgreens, and dwarf fruit trees on windowsills, under grow lights, or in dedicated indoor garden spaces. Many vegetables and herbs thrive in indoor conditions with proper care.

6. Heated Propagation Mats:

Propagation mats with adjustable temperature settings provide ideal conditions for germinating seeds and rooting cuttings during colder months. They accelerate seedling growth, allowing for earlier transplanting.

7. Proper Soil Management:

Healthy soil is the foundation of successful gardening. Implement good soil management practices, such as mulching, composting, and using organic matter to improve soil structure and fertility. Well-nourished soil will support plants during the extended growing season.

8. Monitor and Control Temperature:

Invest in a thermometer to monitor temperature variations in your garden, especially during the shoulder seasons. You can adjust your season extenders accordingly to maintain optimal growing conditions.

9. Crop Selection for Each Season:

Plan your garden to include a variety of crops for each season. For example:

  • Spring: Start with cool-season crops like lettuce, radishes, and peas.
  • Summer: Transition to heat-loving plants like tomatoes, peppers, and basil.
  • Fall: Return to cool-season crops, including kale, broccoli, and carrots.
  • Winter: Focus on hardy vegetables such as Brussels sprouts, spinach, and winter squash.

10. Stay Informed and Experiment:

Gardening is a dynamic process, and climate conditions can vary from year to year. Stay informed about your local climate and weather patterns. Don’t be afraid to experiment with new techniques and varieties to see what works best for your unique growing conditions.

Extending your growing season is not only achievable but also immensely rewarding. By implementing these tips and techniques, you can enjoy a year-round supply of fresh, homegrown produce and explore the joys of gardening in all seasons. Whether you’re a beginner or a seasoned gardener, the journey of year-round gardening is both educational and fulfilling. Happy gardening!

How to Grow Potatoes at Home in Grow Bags: A Step-by-Step Guide

Potatoes are a versatile and beloved vegetable that can be grown in various ways, even in limited garden spaces. If you have a small backyard, balcony, or even a sunny window sill, you can successfully cultivate your own potatoes in grow bags. Growing potatoes in containers is not only space-efficient but also allows for easy harvesting and minimal pest problems. In this guide, we’ll walk you through the steps to grow delicious potatoes at home using grow bags.

Materials You’ll Need:

  1. Potato Seedlings: You can purchase certified seed potatoes from a local nursery or online. Choose disease-free varieties suited for container gardening like Yukon Gold, Red Pontiac, or fingerling potatoes.
  2. Grow Bags: Opt for fabric grow bags with good drainage and a capacity of at least 10 gallons per plant.
  3. Potting Mix: Use a high-quality potting mix or create your own mix by combining equal parts of garden soil, compost, and peat moss.
  4. Fertilizer: Choose a balanced, slow-release fertilizer with an NPK ratio of 10-10-10 or similar.
  5. Watering Can or Hose: Ensure you have a reliable water source nearby.
  6. Sunlight: Potatoes need at least 6-8 hours of sunlight daily, so choose a sunny spot.

Step-by-Step Guide to Growing Potatoes in Grow Bags:

1. Prepare Your Grow Bags:

  • Fill each grow bag with about 4-6 inches of potting mix. Leave enough space at the top for planting the seed potatoes and adding more soil later.

2. Chit Your Potatoes:

  • A few weeks before planting, lay your seed potatoes in a cool, well-lit area to encourage sprouting. Each potato should develop multiple short, sturdy sprouts called “chits.”

3. Plant Your Potatoes:

  • Once your seed potatoes have chitted, plant them in the prepared grow bags. Place them sprout-side up, about 3-4 inches deep, and space them about 8-12 inches apart.

4. Cover and Water:

  • Gently cover the seed potatoes with 2-3 inches of potting mix. Water thoroughly to ensure the soil is evenly moist but not waterlogged.

5. Maintain and Fertilize:

  • As your potato plants grow, continue to add more potting mix to the grow bag, leaving about an inch or two of the plant exposed. This encourages the development of more potatoes.
  • Fertilize your potato plants every 2-3 weeks with a balanced, slow-release fertilizer according to the package instructions.

6. Provide Adequate Sunlight:

  • Ensure your potato plants receive plenty of sunlight, ideally 6-8 hours a day. If you’re growing them indoors, use grow lights to supplement natural light.

7. Watering:

  • Keep the soil consistently moist, but avoid overwatering, as soggy soil can lead to rot. Water deeply whenever the top inch of soil feels dry.

8. Monitor for Pests and Diseases:

  • Regularly check your potato plants for signs of pests like aphids or diseases like blight. Early detection is key to successful pest and disease management.

9. Harvesting:

  • Potatoes are ready to harvest when the plants flower and start to die back. Carefully dig around the base of the plant to avoid damaging the tubers. Gently lift out the potatoes.

10. Enjoy Your Homegrown Potatoes:

  • After harvesting, allow your potatoes to cure in a cool, dark place for about two weeks. This helps to toughen the skin and improve flavor.
  • Once cured, store your potatoes in a cool, dry, and dark location, and enjoy them in your favorite potato dishes.

Growing potatoes in grow bags is a rewarding and space-efficient way to enjoy fresh, homegrown produce. With the right materials, care, and attention to detail, you can harvest a bountiful crop of delicious potatoes right from your own garden or balcony. So, roll up your sleeves, get your grow bags ready, and start planting your own potatoes for a truly satisfying gardening experience. Happy gardening!